uPrint 3-D Printer
Primary Equipment:
uPrint 3-D Printer
Created: March 6, 2014 by Kyle Branch
Revised: March 10, 2014 by Anthony Butterfield
University of Utah, Chemical Engineering
The Stratasys uPrint printer has a 6 x 8 x 8 inch print area, and a 0.1 mm print accuracy. It can only print in ivory colored abs plastic, which costs approximately $5/in3.
 |
 |
File Creation
To use the 3D printer, you must prepare a 3D model in the .STL file format. Most 3D CAD software packages can create this type of file, including professional software like SolidWorks, or free software such as FreeCAD and Blender. The .stl file must be of a 3D solid object, not of just the object’s surface.
Startup
- Turn on the printer, using the switch on the outside back left corner.
- The printer will begin to auto-calibrate shortly after being turned on.
- The machine should say Idle, Queue Empty
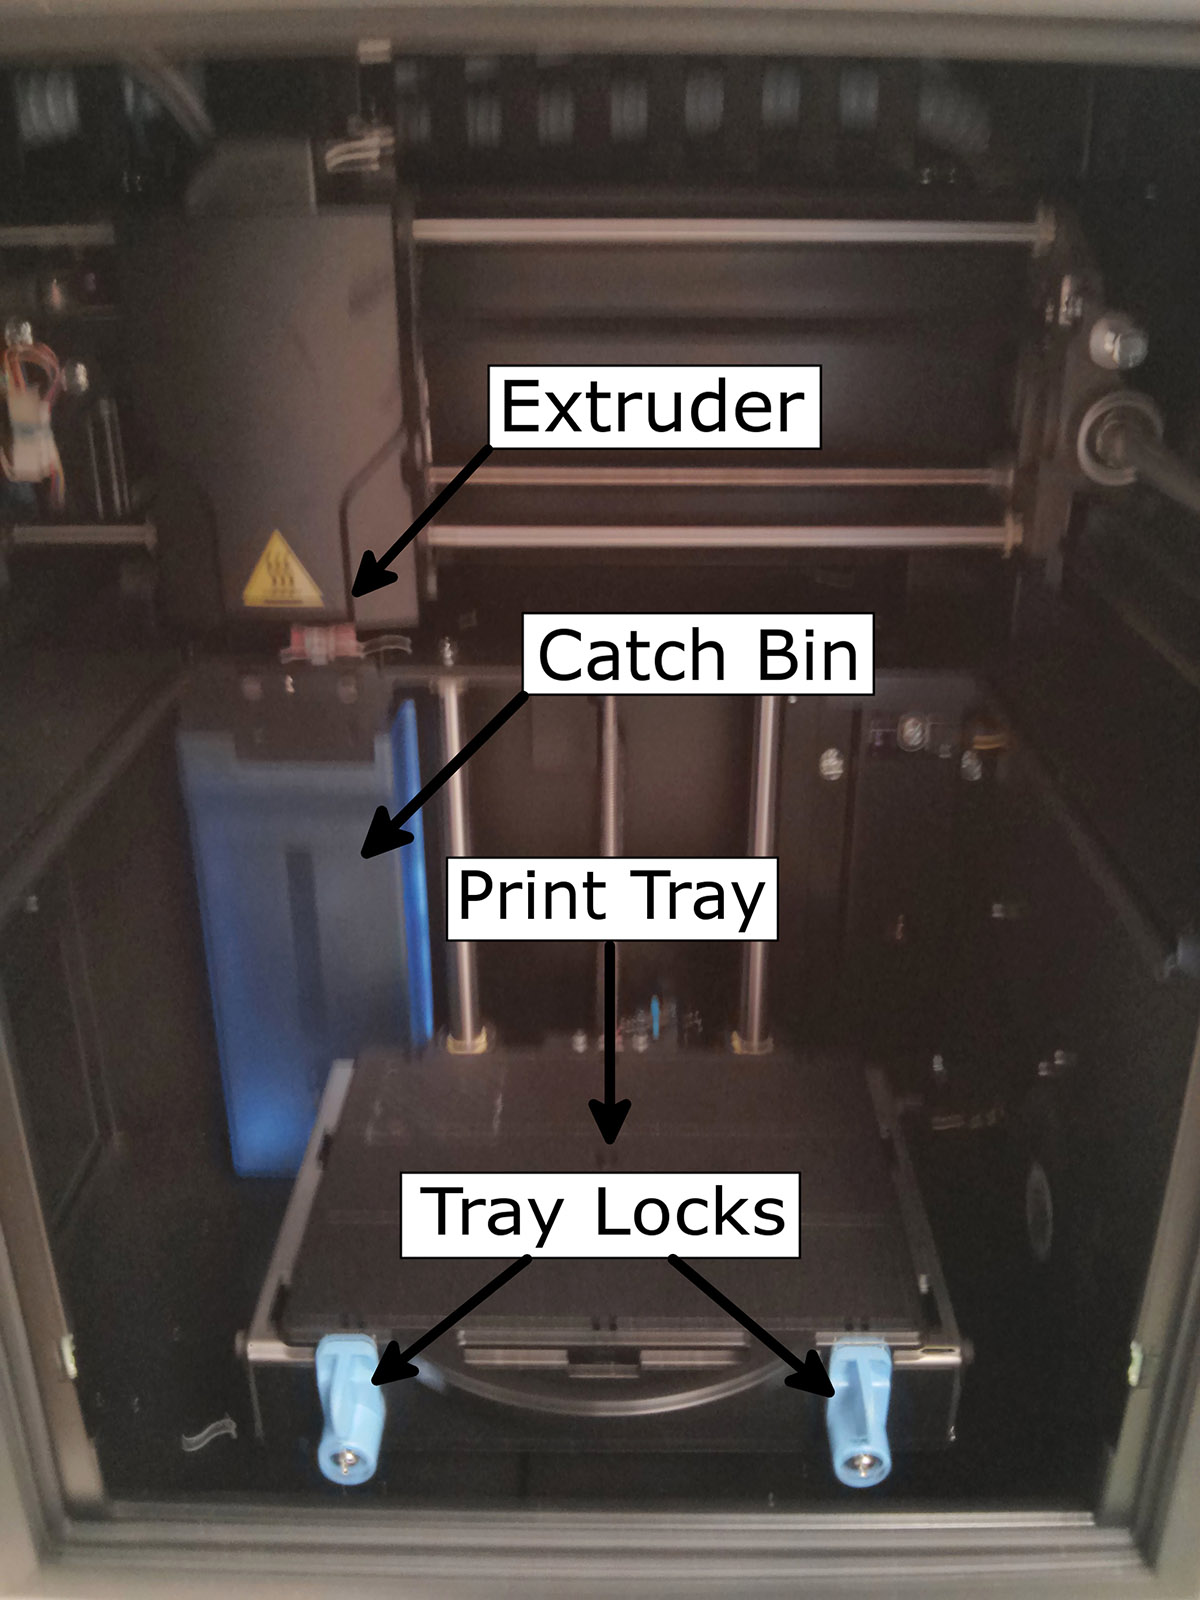
- Make sure the blue catch bin inside the printer is empty to prevent fires. To remove it, slide it up then outwards.
File Upload
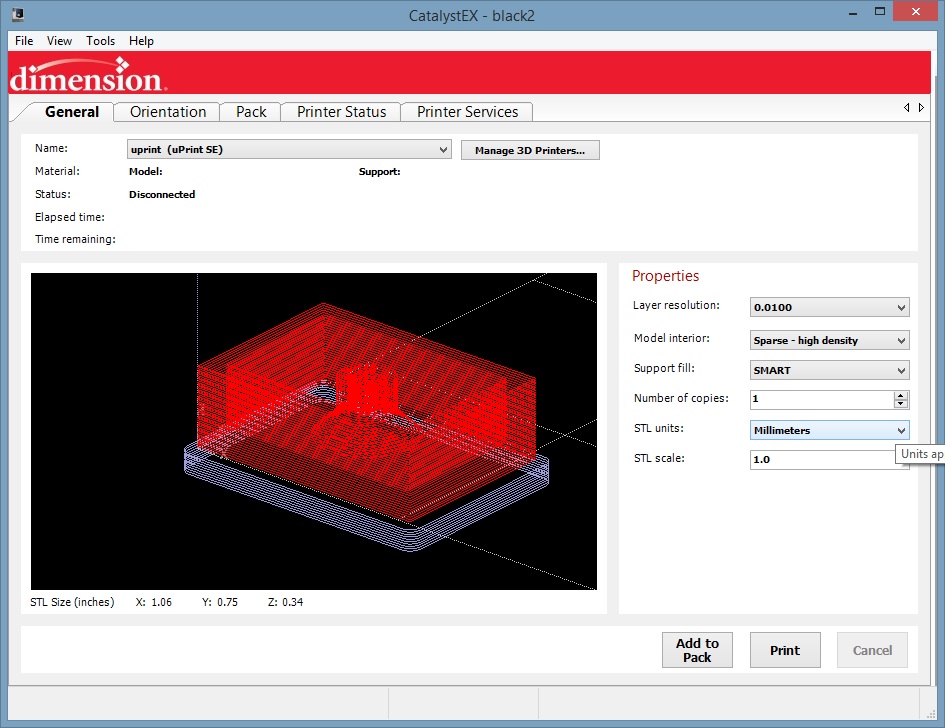
_In order to print a part, you will need a computer with the CatalystEX software.
_Install the software from the disk, which can be obtained from the lab manager, then get the printer’s IP address located on the machine.
_In the CatalystEX program, under the General tab, click “Manage 3D Printers…”, choose “Add Manually…”, then input the machine’s IP address.
_In the menu, choose “File”, “Open STL…”, then browse for your .stl file.
_In the “General” tab, choose Inches or Millimeters for your scale, then for Model interior, choose “Sparse – low density” to save plastic; this will make the interior of the object print sparsely.
_In the “Orientation” tab, click “Auto Orient”. This will automatically rotate your object, trying to minimize the required support material.
_In the “Pack” tab click “Add to Pack” to add your object. You can then move the object’s location on the preview, to position it over a clean area of the tray.
_After everything is the way you want it, press the “Print” button on the “Pack” tab.
Printing
Note: If at any point a problem occurs, you can manually power down the machine with the power switch. This will not damage the machine; however your current print job cannot be resumed.
_Before printing a part, make sure there is a clean printer tray in the machine with enough space for your part that has never been used. Reusing a tray can cause warping and deformed parts.
_To remove a print tray simply unlatch the two blue locks at the front, then firmly pull the black tray horizontally outwards.
_Replace the used tray with a new one from the box, and lock it back into place.
_After sending the file to the printer, you will need press “Start Model” on the printer. Double check the filename on the printer to ensure it’s the correct part.
_The printer will begin to warm up; this will take about 20-25 minutes. The printer will show you the temperature of the print material (M), the support material (S) and the extruder (E), the extruder needs to reach 75°.
_The printer will again auto calibrate, then heat the print materials to 300°. This will take approximately 5 more minutes.
_The part will then begin to print. Note: The first several layers of the print are support material.
_Choose “Auto power down” on the machine if you will not be there to remove the part when it is finished. If the machine is on standby, it will keep the printer’s interior heated.
Removing Parts
Warning: The interior of the machine will be hot after printing!
_After the part is finished printing, remove the print tray and part from the machine.
_It is easiest to pull the part off of the tray while it’s still hot.
_For large objects, it is possible to twist the tray until the support material starts to break loose.
_If the tray still has a large unused portion, make sure to remove all of the residue support, then return the tray to the machine; otherwise replace it with a new tray.
Changing the Material Cartridges
If the printer is low on material, contact the lab manager to get the material changed.