MIL Extrusion 3D Printers SOP
Standard Operating Procedure
Safety: Keep hands, hair and articles of clothing away from the printers when operating. Be aware that the extruders are very hot. Keep flammable materials away from the printers.
- Design the piece you want to print in your choice of CAD software.
- Keep in mind that overhangs will be problematic. The printer cannot extrude a long platform that hands over nothing. If you have a subtle slope up to an overhang, they may be workable, however. This is not an issue on the uPrint printer which uses support material.
- Use as little material as possible in your designs.
- When you are finished, you will need to export your work as an STL file.
- Assure the print platform is clear of printed items or debris.
- Email your STL file to the printer’s computer at uchem3Dprinters@gmail.com or transfer it to the computer on a flash drive.
- Open the printer software (uPrint or FlashForge) and drag your STL file into the software window.
- For the uPrint
- Follow the software instructions in the accompanying manual.
- Safety:
- The interior of the printer may become very hot; use gloves to manipulate the heated interior.
- Be sure to empty the bin that holds extrusion material from clearing the tip; it’s the bin in the back left of the interior of the uPrint. If this becomes full it becomes a fire hazard.
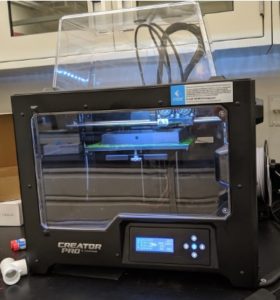
- For FlashForge printers.
- If you can print in PLA, please do so. ABS tends to clog the extruder.
- Assure you have enough material, and see the printer’s manual to relod material if needs be.
- Assure the bed is covered by a flat layer of Kapton tape.
- Position your piece on the virtual platform in the software, ensuring it’s positioned to avoid overhanging material.
- Select the correct extruder in the software (Note: the “right” extruder refers to the extruder to your right if looking at the printer)
- Insert a flash card into the computer.
- Press the “Print” button in the software.
- Make sure you select the standard PLA (or, if needs be, ABS) options in the print settings. If you are unsure on the many settings, consult the lab manager.
- When you finalize the settings the software will save the file needed by the printer. Save this file to the SD card.
- Put the care in the printer (just inside the printer).
- Select “Print from SD” and it will give you an error everytime. Just select “Print from SD” again.
- Select the file you wish to print, and the startup sequence should begin.
- Wait and observe at least the first couple layers of the print to make sure it does what you expect it to do.
- You do not need to continually pay attention to the printer but every 10 to 15 min someone should be there to check on the print, otherwise a lot of material may be wasted or hazard may be created if the printed material detaches from the base.
- Do not print items overnight, when no one can check in.
- Once your print is completed:
- uPrint:
- Remove the platform while wearing gloves to protect you from the temperatures in the printer.
- Remove your piece from the platform. You may need a spatula to detach your piece.
- Turn on the caustic bath (which will dissolve your support material),
- Wearing gloves and safety glasses, place your piece into the caustic bath.
- Depending upon the amount of support it may take from a couple hours to overnight to fully dissolve the support material.
- Wearing gloves and safety glasses, remove your piece from the caustic bath and place it immediately into a plastic bin, making sure not to drip on the counter or floor.
- Take the bin to a sink and thoroughly rinse off your piece and let it soak in water for at least an hour.
- FlashForge:
- Use the spatula to remove your piece, being careful to not touch the hot platform or tear the kapton tape.
- Clean off the platform and interior of the printer of stray material. If the tape is damaged, replace it for the next user.
- uPrint: