MIL Laser Cutter SOP
Standard Operating Procedure
SAFETY: Safety glasses should be worn at all times when using this equipment. Long hair or other items that may get tangled should be removed or tied back. Keep hands away from interior moving parts. Assure the building ventilation system is pulling air through the cutter before use. Do not cut unapproved materials in the cutter (If it is not acrylic, ask the lab manager if and how to cut it).
Operation Video:
SOP:
- Inspect the laser cutter cutting bed to assure there are no objects left in it and remove any materials that the cut head may hit before you turn it on.
- Check that the building ventilation system is pulling air through the cutter; you can hear the air being pulled through the back and into the wall. If the fume hoods in the lab are offline, so too will be this venting line. The laser cutter should not be used without ventilation.
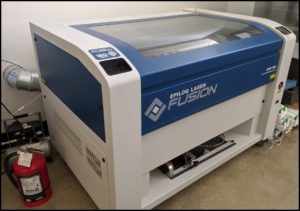
- Turn on the power to the laser cutter (black switch at the front of the cutter, to your right). The cutter will go through a start-up sequence, taking about 2 minutes, and the cut head and cut bed may move; keep hands clear. If the cutter does not power up, it is very likely the large red stop button at the front of the equipment is depressed and must be turned to depress the button.
- Log on to the computer using:
- Username = laser
- Password = Epiloglaser
- Open CorelDraw 2019 from the desktop
- In the “Create a New Document Window” select the Epilog Laser preset from the preset drop-down window.
- Go to File > New, and name your file
- The page size as set in the Create a New Document Window, and the piece size as set in the Epilog Engraver Properties window must match. If these sizes do not match you will get an error reading “1 Issue” indicating that your drawing will not fit on the selected media.
- To fix this, open the print dialog window and click on the “wheel” icon to the right of the printer drop-down window. This will open the Epilog Engraver Properties window. In the Epilog properties window enter the laser bed dimensions in the piece size windows:
- Horizontal = 40 inches
- Vertical = 28 inches
- The page size may be set from the software’s layout tab.
- Draw your desired cut path, or import it from another program. The computer’s Chrome browser should be signed in to uchenlasercutter@gmail.com and you could email designs there.
- Note that the lines you wish to cut or etch must have a line width of “Hairline” and this may be checked in the software’s toolbar after selecting the line you wish to alter. Use Ctrl-A to select all lines and convert them to hairline.
- When ready to cut, go to File > Print and the print dialog will open.
- Go to the Layout tab and select “As in Document” to assure the laser will cut in the same location you indicate in your drawing.
- Select the general tab and click on the “wheel” icon to the right of the printer drop-down window. The Laser Properties window will open.
- Check the Send to Manager and Send to laser boxes.
- Uncheck the Speed Comp and Power Comp boxes.
- Check the Auto Focus box.
- Enter the thickness of the material you will be cutting in inches. It is important for safety that this is correct. Too thick and the laser will focus above the material and could set it on fire. Too thin and the laser cut head may run into the material and damage the cutter.
- Verify that the piece size is set correctly as previously described.
- Set the other parameters as desired. Consult your professor for guidance on setting the vector and raster settings.
- For cutting through acrylic: Power should be set to 100% and speed should be altered to match material thickness. It is not possible to give exact speeds needed for different thicknesses as the condition of the beam changes as the lens ages and is cleaned. However, between 4% and 8% should be sufficient for ¼” acryllic and 10% to 15% should be sufficient for ⅛”. Do not cut at 100% power and less than 4% speed as you will be more likely to create a fire. If that is not sufficient to cut through your material, simply cut multiple times, allowing the material to cool a minute between each cut.
- For etching the surface of acrylic: Power can be in the range of 10% to 50% and speed between 20% and 50%, depending upon how deep you wish to etch your line. Even 10% and 50% speed should create a visible line.
- For rastering an image, ask the lab manager.
- If you wish for different line colors to be used to differentiate between cutting and etching: We would recommend you use black lines to cut and set those cut settings in the default properties window. For etching, use the color tab. We would use rgb red for etching (e.g. r:255, g:0, and b:0); you must have the colors be the exact values of rgb in the color tab. Set the red line for etching speed and power; be sure to also set the proper material thickness. Repeat for other desired speeds and powers, but typically only one cut and one etch is needed.
- Assure the piece size in the epilog print properties window is as big as the canvas size on your drawing (Typically this should be 40” wide and 28” high).
- Click OK to close the properties window.
- Select the Print Preview button at the bottom – left of the Print window. Verify that the print preview displays your drawing correctly.
- Select Apply and Print.
- The green “Data” light should light on the laser control panel, as the design is communicated to the cutter. You cannot cut until this light turns off. Once it is finished your file name should now be displayed the laser cutter display panel (with a parenthetical number representing the number of times you’ve sent the file to the cutter).
- Place the material on the laser cutter bed, typically oriented from the top-left corner. When selecting acrylic material, to save lab fees:
- Favor cutting pieces just big enough to fit your cut, over larger pieces. Definitely do not cut into a new sheet of material if you can fit your cut on a piece of scrap.
- Favor clear materials over material with pigment if you can. It’s cheaper.
- Place your cut towards the edge of the material. Cutting into the middle of a piece leaves more material unusable.
- Press the visible laser button on the laser control panel; it’s adjacent to red lines laser symbol. A low-power red laser should now show at the cutting laser’s focus (you may need a white piece of paper to see it easily).
- With the lid open and all hands away from the cut bed, press GO on the laser cutter. The cutting laser will not have power with the lid open, and you can watch it follow it’s cut path to assure you’ve properly positioned your piece using the visible laser. Do not put your hands in the cut bed on the first run; sometimes it moves unexpectedly if you have some unseen line in your design.
- Once you’ve observed a complete run and no unexpected movements have occurred. You can position your piece. It is often helpful to press Go and let it run to a known line and then press stop. The laser will stop at the next corner which you can use to also position your piece.
- If the laser head appears to be following the correct path, close the lid, and turn on the small compressor on the floor at the side of the cutter to blow air at the focus and prevent fire.
- Press GO. The laser will now fire.
- If you are cutting all the way through, the laser should flash a white light as it hits the metal grid below your material. If you do not see this flash, you did not likely cut through and should take care to not move your piece. If you are not certain, you can hold the piece down in place with one hand after the cut, and pull up an edge to see if the pieces are separated. If you do not move the piece, you can always hit Go again and likely cut through. A lot of our material can be wasted on incomplete cuts.
- Once you are done, remove all material from the cut bed and put the scraps in the appropriate bins. Turn off the compressor.