MIL Mii Craft SOP
Standard Operating Procedure
Safety
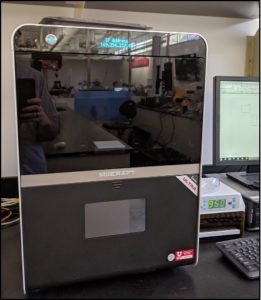
The MiiCraft Ultra 50 DLP-SLA 3D printer uses ultraviolet light to cure the resin. Therefore, the front door of the printer should remain closed at all times. If for some reason the door must be opened, one (1) operator should be near the machine and open the door while wearing UV glasses/goggles.
The resin used in the DLP-SLA printer is a skin irritant before the curing process. Operators handling the liquid resin at any stage must wear nitrile gloves for protection.
Operating Procedure
- Ensure the Printer is Clean:
-
- Remove resin bath by lifting all four clamps and slowly lifting the bath straight upward.
- Inspect the bath for any uncured resin or cured resin stuck to the film. If there is resin to clean, see Step 3.
- Return the clean bath to the printer and secure all four clamps.
- Remove the printer stage. Push up on the black tab to unlock the stage, and pull the stage straight out of the machine.
- Inspect the stage for any uncured resin or cured resin stuck to the surface. If there is resin to clean, see Step 3.
- Return the stage its proper position and push down on the black tab to lock the stage in place.
- Pour resin into the resin bath until the first fill line located on the back wall of the bath.
- Close the printer door.
-
Operate the Printer:
-
- Power on the MiiCraft DLP-SLA 3D printer by holding the power button (located in the top left corner of the front of the machine) until the display turns on.
- Log onto the controlling computer to the left of the MiiCraft machine.
- Open the MiiUtility software. The program should load with a design canvas showing an x-y plane.
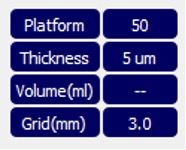
- If it is desired to change the printer thickness, click on the thickness setting located in the top left of the window. See the Recommended MiiCraft Settings table at the end of this SOP. Do not change the platform setting. This must be set to 50 for the MiiCraft Ultra 50.
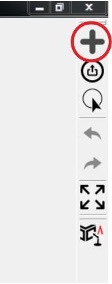
- Load a desired design of a print in a .stl file type by pressing the add object icon, located on the taskbar located on the right side of the program.
- Adjust the size, orientation, and supports as desired.
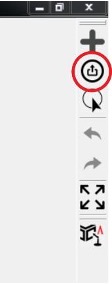
- When the design is ready to print, select the printer icon located immediately below the add object icon. When prompted to enter semi-auto mode, select no.
- A window will appear to save a .slc file. Save the file in the desired location.
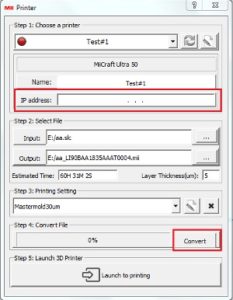
- When the printer window appears, enter the printer’s IP address (shown on printer display). Select the desired printing setting in Step 3. It is recommended that the 30μm setting is used see Recommended MiiCraft Settings table). Convert the file. Once it has completed the version, launch to printing.
- A MiiController window appears. Select the converted file from the previous step by clicking Select From PC. The design will appear on the right side of the window.
- Set the desired curing time and print speed (see Recommended MiiCraft Settings table). Select Print.
- Allow the printer to complete the print. This process can take many hours, depending on settings. The status of the print can be monitored via the computer’s display.
- Carefully remove the stage, making sure the new print is not damaged.
- Using a putty knife, carefully scrape beneath the print and the stage and pry the print from the stage.
-
Shutdown and Cleanup:
-
- Wipe any excess resin from the stage with a Scott Rag.
- In a fume hood, thoroughly clean all parts of the stage using Isopropyl Alcohol (IPA) and a KimWipe.
- Return the stage to its operating position and lock it in place with the black tab.
- Remove the resin bath from the printer, and pour any remaining uncured resin from the bath into a container for designated for recycled resin.
- Wipe any excess resin from the inside and outside of the bath with a Scott Rag.
- In a fume hood, thoroughly clean all parts of the bath using IPA.
- Return the bath to its operating position and secure all four clamps.
- Press and release the power button to activate the shutdown procedure.
- Hold the power button until the display powers down.
- Save any unsaved designs, and close all programs.
Recommended MiiCraft Settings
| Print Parameter | Layer Thickness | Curing Time | Print Speed | Object Orientation | Print Resolution |
| Recommended Setting | 10μm | ≥ 8 s | Normal | Flat | 30μm |