Turbine Electric Generator The 2nd
Summary
A wide variety of energy sources are needed to power our society, but most of them involve one common device, an electric turbine. As a turbine is made to spin, be it from flowing steam in a coal or geothermal power plant, or from wind turning a wind turbine, it generates electricity for our homes and businesses. In this module, you will use the power of your lungs to turn a turbine and create electricity.
General Information
Materials & Methods
(approximately $7 per kit)
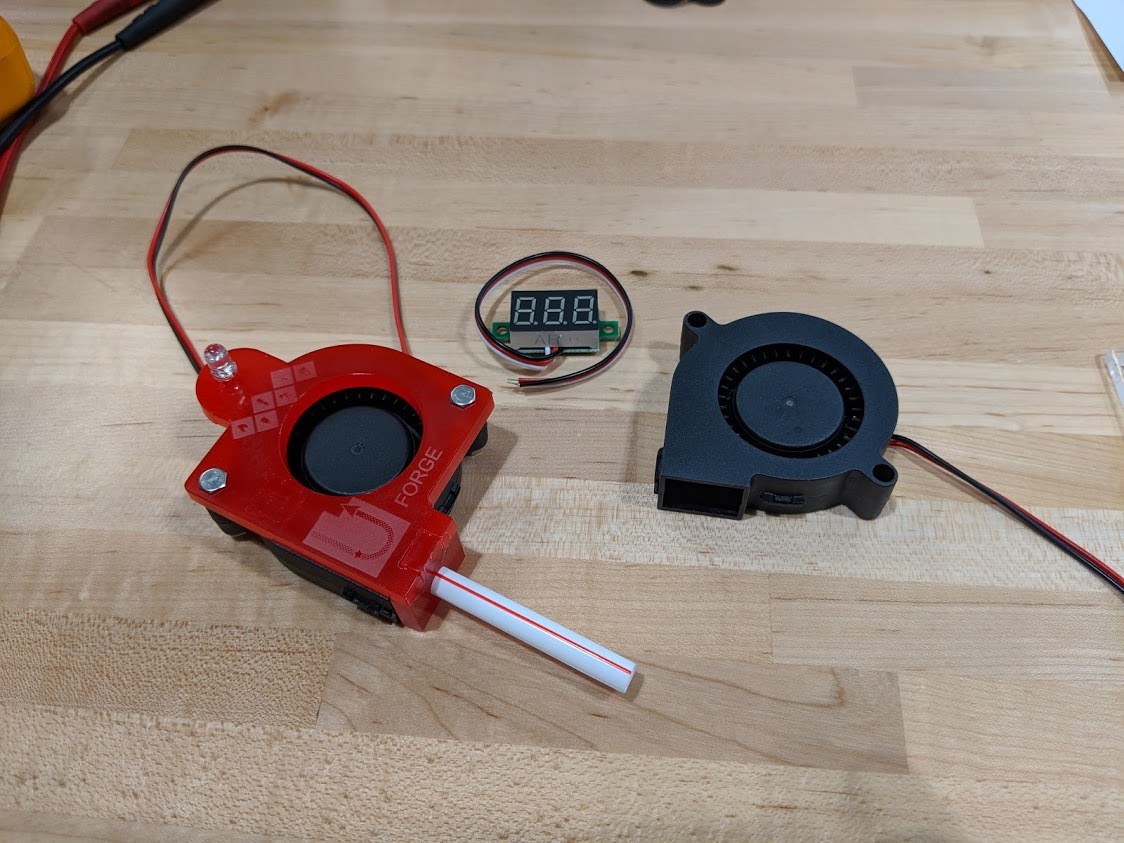
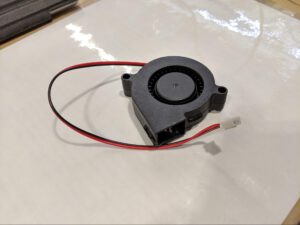
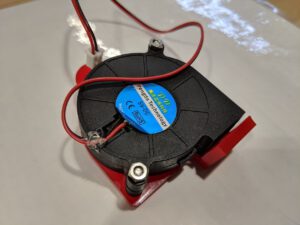
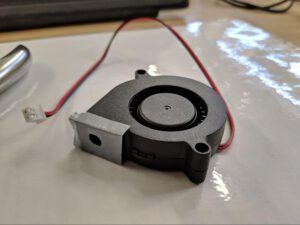
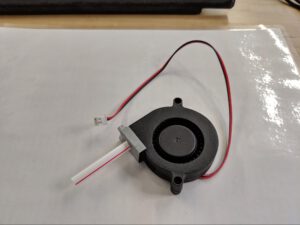
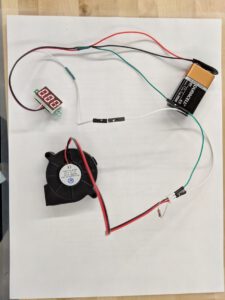
- A 5V Brushless DC Cooling Blower Fan – A fan, ran in reverse, will act as our generator. These fans are typically used to cool electronic components, such as processors. They may be found on sites such as Amazon.com by searching “5V Brushless DC Cooling Blower Fan” for between $1 and $2 a piece (https://www.amazon.com/s?k=5V+Brushless+DC+Blower&ref=nb_sb_noss, https://www.amazon.com/dp/B0775ZM4DW/ref=cm_sw_em_r_mt_dp_U_POqPCbXWHZDWF). To prolong their usefulness, you may wish to add a small bead of hot glue to where the wires come out of the blower, to keep students from pulling off the connections (shown in the second image below).

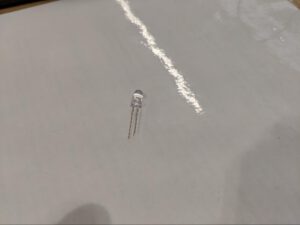
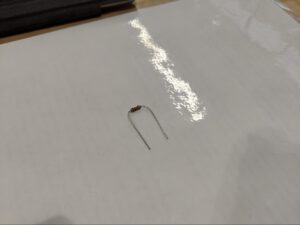
- LED Light – These light emitting diodes (LEDs) will be used to visually demonstrate the generation of electricity. An assortment of colors is recommended to demonstrate that different wavelengths of light require different amounts of energy. Red LEDs alone will suffice and take the least effort to light up. These cost pennies and may be bought in bulk online (For example: https://www.amazon.com/dp/B0749MD16P/ref=cm_sw_em_r_mt_dp_U_LyqPCbGBDB6ZQ ).

- Drinking Straws – These will be used to focus the student’s breath into the generator. They can be cut into fourths to provide many hygienic uses per student.
- Duct Tape (if you do not have an acrylic fan holder) – A small piece of tape may be used to seal the entrance to the blower to maximize power generation.
- A Single Hole Punch (if you do not have an acrylic fan holder) – This is the sort of hole punch one would use in paper to put the paper in a binder. It will be used to put a hole in the tape in which the straw can fit.
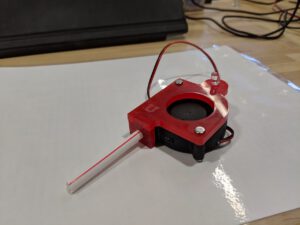
- Fan Holder (Optional) – The hole punch and duct tape can be replaced by a nicer, laser-cut holder for the fan, if you have access to a laser cutter. Our plans for this holder may be found here: https://drive.google.com/open?id=11pWciXoooFlk8ioQuDcfsj6RhTjVtNWg
- 1k Ohm Resistor (Optional) – The resistor is needed in order to conduct power generation calculations. These cost pennies and may be bought in bulk online (for example: https://www.amazon.com/dp/B0185FC5IG/ref=cm_sw_em_r_mt_dp_U_zzqPCbB3TYVF).

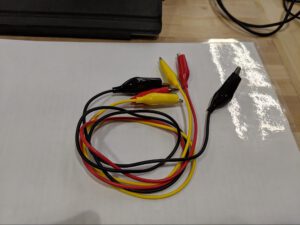
- Wires with Alligator Clips (Optional) – You will need to be able to connect wires if measuring voltage. If you cannot solder them, you can use alligator clips. They can be found online (e.g. search “Alligator Clips“ on Amazon.com: https://www.amazon.com/s?k=Alligator+Clips).

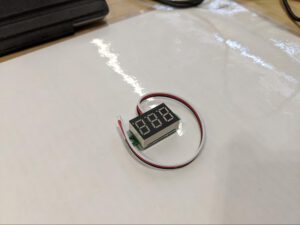
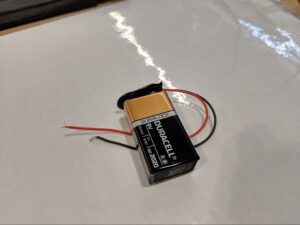
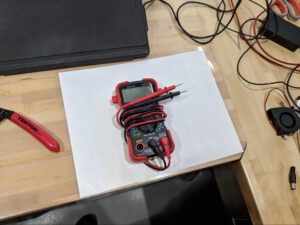
- A Voltmeter (Optional) – This may be used to quantify the power generated by the turbine when used with the resistor. A traditional multimeter or arduino may be used. Inexpensive voltmeters may be found online for around $2 a piece (e.g. search “mini voltmeter” on Amazon (https://www.amazon.com/dp/B00YALUXH0/ref=cm_sw_em_r_mt_dp_U_LuqPCb079CAN7), but note that these will need some sort of power supply, such as a 9V battery.
|
|
OR |
|


-
- If you buy a mini voltmeter make sure you get the three wire version. A 3D printer file for a case for mini voltmeter may be found here:
https://drive.google.com/open?id=1QjPgi2Qpvmdh70YFA0drcueebTy-UnBz
- If you buy a mini voltmeter make sure you get the three wire version. A 3D printer file for a case for mini voltmeter may be found here:
Background for Teachers
Geothermal Energy Production
Geothermal power plants generate electrical energy to power homes and businesses using heat from deep within the Earth. The process generally begins by drilling deep into the bowels of the Earth to reach a point within the Earth where the crust is thin and heat from the molten center of the earth may get nearer the surface. In the FORGE project we are drilling an injection well and a production well, and fracturing the rock between them to allow fluids to flow between the two wells.
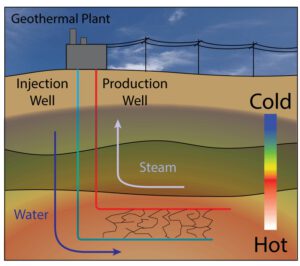

Water is pumped deep below the ground through the injection well into the hot ground. The temperatures here are well above the boiling point of water (over 150 °C). There the water may then boil into steam. Often in geothermal processes the water is at such high pressure that it remains a liquid above a temperature of 100 °C, but later becomes steam as it approaches the surface and pressures are dropped. In both processes the pressurized fluid (liquid or gas) is forced up the production well.
In the geothermal plant, this high-pressure steam is used to turn a turbine to generate the desired electrical power for homes and businesses. After the turbine the steam has lost pressure and temperature and is sent to a condenser to be converted back into liquid water, which can complete the cycle and be sent down the injection well again.
One of the key reasons geothermal energy is important is because the process is renewable and the water used can be recycled. Further, geothermal can meet our minimum energy demands reliably, not being interrupted by factors like weather or night and day cycles.
Turbines
The process of actually generating the electrical energy is performed by a spinning turbine, which is a common tool in power generation from hydroelectric to nuclear to coal-fired power plants. Turbines spin as the fluid flows through the blades which rotates an electromagnetic shaft attached to the turbine. An electrical generator produces electrical energy from this rotating, electromagnetic shaft, according to Faraday’s Law. Within the generator, a small electrical current is generated from rotating the shaft inside coils of wire; however, with the large number of coils of wire, many small electrical currents add together to form one large electrical current. This final large current is what is used to power our homes and businesses.

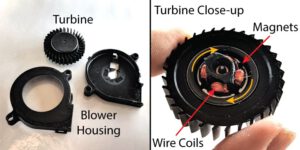
Above you can see the blower used in this module that we’ve disassembled. The four wire coils are held still. As air enters through the blower opening, the turbine blades, which contains magnets, catch the flowing air and are made to spin around the coils. This movement of the magnetic field induces a current in the wires which can be used to, say, turn on a light.
Power
Electrical power can be expressed in terms of voltage and resistance. According to Joule’s First Law, power can be expressed by the following:
![]()
Where P is power, I is electric current, and R is resistance. To obtain power in terms of measured voltage across a know resistance, R, we must also use Ohm’s Law:
![]()
Solving for I and substituting into Joule’s First Law we obtain an equation for power in teams of what is known in this module, voltage and resistance:
![]()
Using the voltage, V, value across the 1 kΩ resistor, R, the amount of power generated by the person blowing into the turbine can be determined. For example, if the voltmeter read 2.0 V, we could calculate the power generated to be 4 milliwatts by:
![]()
Light Color
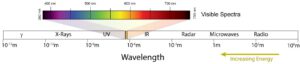
Not every photon of light takes the same amount of energy to produce. The energy of a photon is a function of its wavelength according to:
![]()
where E is the photon’s energy, h is the Plank constant (6.626e-34 J⋅s), c is the speed of light (2.998e8 m/s), and λ is the wavelength of light. As energy is a function of one over the wavelength, as the wavelength goes up the energy of the photon decreases.

Some different colored lights on different fans are more difficult to light up than other colored lights. While it is not a direct path between the equation above and the force from the lungs needed to light up a light, they are related and this module allows for the students to make a very tactile connection to photonic energy.
The red light corresponds to photons with a relative large wavelength (≈ 650 nm) within the visible spectrum while a blue light corresponds to photons with a relatively small wavelength (≈ 450 nm) . This means that the red light corresponds to a lower energy level, and to achieve the same light brightness less blowing is needed than with the blue light.
This difference can also be seen in the requirements to light each LED. Red and yellow LEDs generally take around 2 V to power, while blue and green LEDs generally take 3 V. Going back to the electric power equation, we can see that more volts are also a sign of more power spent (making some simplifying assumptions).
Intended Learning Outcomes
Demonstrate electric power generation using your lungs and a small blower. Students will understand transfer and conservation of energy and be able to describe the relationship of energy to wavelength or frequency for electromagnetic radiation.
Instructional Procedures
- Group students into groups of 3
- Pose questions to students (See this module’s technical background for details)
- How do we produce energy from natural resources?
- What are some forms of energy, conventional and alternative?
- What is geothermal energy and how is it different from other renewable energy sources?
- How do various forms of energy production use turbines? Coal, natural gas, geothermal, wind, hydroelectric…
- What forms of energy production do not use a turbine? Solar electric, thermoelectric…
- Teach students background information on energy and energy production found later in this lesson plan.
- These slides may also be used: https://docs.google.com/presentation/d/13YqfsydCOcCD4gXyA8AWGXkwOmVul06SXpOyMOQhhkQ/edit?usp=sharing
- Give each group a blower.
- To prepare the blower:
- Rip off just enough tape to cover the opening on the blower.
- Punch a hole in the tape so that it would appear in the middle of the opening.
- Insert the straw into the hole, but not far enough in that it might interfere with the rotation of the blades in the blower.


- Alternatively, if you have the acrylic fan holder, the assembly is very similar, but the LED can be inserted into the holder.

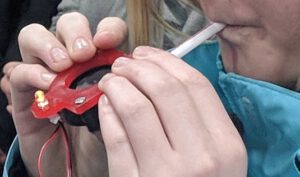
- Activity #1 – Breath into Light (Grades K to 12):
- Have each student prepare their blower with a straw as described above.
- Give each student an LED.
- Plug the LED into the wires from the blower. The long wire of the LED should typically connect to the red wire of the blower, and the black to the shorter LED wire. However, if the light does not come on with significant blowing, you may try switching the wires (infrequently, LEDs come with non-standard lead lengths).
- Have students blow into the straw to cause the blower blades to revolve. Blowing hard enough, the LED should light up (if it does not, you may need to check switch the red and black wires to the LED).
- Students may compete to create the brightest light for the longest time.

- Activity Expansion:
- Give the students LEDs of multiple colors, and have them repeat their attempt to light them up.
- Ask for observations on the effort it takes to light each color.
- The LEDs that produce shorter wavelengths of light (green and blue) generally require more energy–and student effort–to light up than those with longer wavelengths (red and yellow). This is an opportunity to discuss, in a tactile way, how the energy of light depends on the color (wavelength) of the light (e.g. it takes more energy and effort to make blue light than red light).
- Activity #2 – Calculating Power Generated (Grades 5 to 12):
- Give the students voltmeters. This module will show the inexpensive mini-voltmeters, powered by a 9V battery, but any multimeter could be used.
- Disconnect the LED, if it is still connected.
- Connect the voltmeter, 1 kΩ resistor, and multimeter according to the following:
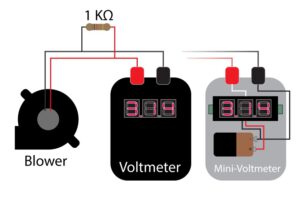


In the above, the resistor should connect the red and the black wire and that voltage should be measured by the voltmeter. If using the mini-voltmeter, the black wire from the blower connects to the black wire on both the battery and display. The red wire on the display connects to the red wire on the battery. The white wire off the display connects to the red wire off the blower. The connector on the blower may be used to attach both the voltmeter and the resistor, by plugging the leads of the resistor through the back of the connector:

- Instruct the students to record the maximum voltage they can produce by blowing through the turbine. This value should be somewhere around 2 volts.
- Instruct them to calculate the power being generated using the theory in the technical background of this module (
 ). This power should be quite small, around 4 mW.
 - Gather maximum powers from each team. Have the class take the average and calculate how many people blowing into turbines it would take to light up one 50 W light bulb as a means to illustrate the power being generated (it should be over 1,200 students). To give perspective and impress upon them the importance of geothermal power plants, a teacher could compare this result to a large geothermal power plant in the US, which would produce about 100,000,000 W. How many students = one geothermal power plant? (about 25,000,000,000 students, far more than the number of humans on the earth…)
- Discuss with the class how the efficiency of this process is improved in practice: turbines are scaled-up; turbines are better designed for power generation then the blowers, which are designed to do the opposite; a constant and reliable pressure of fluid can be extracted from the earth and the turbine can be optimized for those conditions; and so on.
- Other possible topics:
- How do various forms of energy production use turbines? Coal, natural gas, geothermal, wind, hydroelectric…
- What forms of energy production do not use a turbine? Solar electric, thermoelectric. Our thermoelectric module could be conducted at this point: https://docs.google.com/document/d/1Xnn2P6hM8n8FC8QsvAp0rWdXy52WREG-xc7GuULjH1Y/edit?usp=sharing
Acknowledgements
Supported by funding from Utah’s Governor's Office of Enginergy Development, and the US Department of Energy’s Utah FORGE project.